How to create local cluster
Simple guide on how to create a local cluster
Introduction
Ilum makes it possible to manage multi-cluster architecture from single central control plane and it does all the configurations automatically. You only need to register your cluster in Ilum and configure networking a little bit. More about cluster management in Ilum read here.
This guide goes through creation of a local cluster - a simulation of cluster which is launched inside of ilum-core server. You can use it for testing capabilities of cluster management in Ilum.
Demo
Here you can see a demo on how to add a local cluster to Ilum Guide in Full Screen
Guide:
Go to cluster creation page
- Go to Clusters section in the Workload
- Click on the New Cluster button
Specify general settings:
- Choose a name and a description that you want: they will help your team members understand what is the cluster created for
- Set cluster type to Local
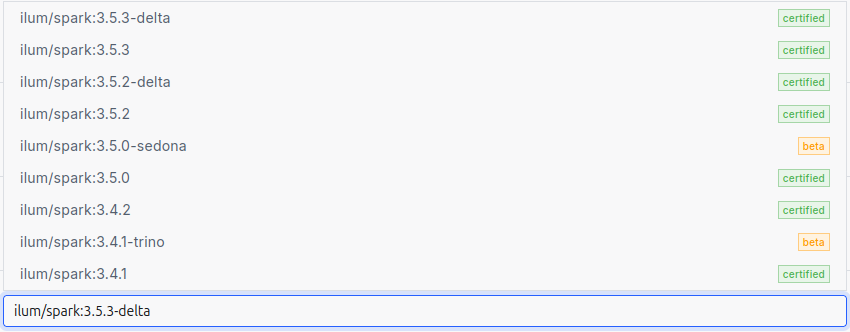
- Choose a spark version
The Spark version is specified by selecting an image for the Spark jobs.
Ilum requires the use of its own images, which include all the necessary dependencies preinstalled.
Here is a list of all available images:

Specify spark configurations
The Spark configurations that you specify at the cluster level will be applied to every individual Ilum job deployed on that cluster.
This can be useful if you want to avoid repeating configurations. For example, if you are using Iceberg as your Spark catalog, you can configure it once at the cluster level, and then all Ilum jobs deployed on this cluster will automatically use these configurations.
Add storages
Default cluster storage will be used by ilum to store all the files required to run Ilum Jobs both provided by user and by ilum itself.
You can choose any type of a cluster: S3, GCS, WASBS, HDFS. In the example above we add S3 bucket for Minio storage deployed in Ilum cluster by default.
- Click on the "Add storage" button
- Specify the name and choose the S3 storage type
- Choose Spark Bucket - main bucket used to store Ilum Jobs files. Set
ilum-files, which is default bucket of the default MinIo storage - Choose Data Bucket - required in case you use Ilum Tables spark format. Set
ilum-files, which is default bucket of the default MinIo storage - Specify S3 endpoint and credentials: for simplicity use
ilum-minio:9000for endpoint andminioadminfor access and secret key. These are endpoint and credentials for Minio Bucket which is deployed on Ilum Cluster by default. - Click on the "Submit" button
You can add any number of storages, and Ilum Jobs will be configured to use each one of them.
Go to local cluster configurations
Here you can use slider to configure how many of Java threads will be used to run the local simulation of a cluster.
Finally, you can click on the Submit button to add a cluster.
Create and test a job
- Go to the Clusters section
- Choose the local cluster in the list to go to its group list
- Click on the New Group button to create a Group.
- Type group name and choose Code type.
- Click on the Execute button, which is placed on the group you have just created in the groups list
- Now you are supposed to be in the code panel. Write this code:
val data = Seq(("Alice", 29), ("Bob", 35), ("Cathy", 23))
val df = spark.createDataFrame(data).toDF("name", "age")
val s3Path = "s3a://ilum-files/output"

df.write.format("csv").save(s3Path)
and click on the Execute button
If the code is run successfully, then everything is set up properly, congratulations!