OAuth2 Security
Overview
OAuth2 with OpenID Connect (OIDC) is a powerful protocol that lets you delegate user authentication to a dedicated server. Instead of managing usernames and passwords in every application, you can use a central identity provider.
When a user tries to log into Ilum, they’re sent over to the authentication server’s login page. After they sign in successfully, they’re redirected back to Ilum with a special JWT token. This token is proof of their identity.
This approach is a game-changer in a microservices world. Ilum leverages this by supporting OAuth2 with OIDC. When a user logs in for the first time, Ilum inspects their JWT token, pulls out key information, and creates a corresponding user and group profile in its own database. You can then assign permissions to these groups, and any user who is part of that group automatically gets the right access.
To get this working, you need to tell Ilum how to map the data from the JWT token to its user fields and provide the connection details for your OAuth2 server in the Helm configuration.
Quick Start Guide
This guide will walk you through setting up OAuth2 in Ilum from scratch. To make things concrete, we’ll use a few tools:
- Minikube: We’ll assume you’re running Kubernetes locally with Minikube. We’ll use its Ingress and DNS features to make our Keycloak instance accessible.
- Keycloak: An open-source identity and access management server that supports both OAuth2 and OIDC. It will act as our authentication server.
- mkcert: A handy tool for creating locally trusted development certificates.
Ilum requires a secure TLS connection to the OAuth2 server, and
mkcertmakes generating a self-signed certificate a breeze.
Our goal is to make Keycloak available at the URL https://auth.test.
Both your browser and the Ilum pods inside the cluster need to reach Keycloak using this exact same address for the authentication flow to work correctly.
Step 1: Create a TLS Certificate for Keycloak
First up, let’s generate a self-signed TLS certificate for our Keycloak server.
-
Run
mkcertto create the certificate files forauth.test:mkcert auth.testThis command creates two files:
auth.test.pem(the certificate) andauth.test-key.pem(the private key). -
Now, create two Kubernetes secrets. The first one will hold the TLS certificate for the Ingress, and the second will store the Certificate Authority (CA) so Ilum can trust our self-signed certificate.
# Secret for the Ingress controller
kubectl create secret tls auth-test-mkcert --cert=auth.test.pem --key=auth.test-key.pem

# Secret for Ilum's trust store
kubectl create secret generic ca-mkcert --from-file=ca.crt=auth.test.pem
Step 2: Set Up Minikube Ingress and DNS
For your local machine to resolve auth.test to your Minikube cluster, you need to configure Minikube’s Ingress and DNS.
This setup varies by operating system,
so it’s best to follow the official Minikube documentation.
This is a crucial step to ensure your browser can find the Keycloak login page.
Follow steps 1 to 4 in the guide and optionally test the DNS resolution.
Step 3: Install and Expose Keycloak
With the networking prerequisites out of the way, let’s deploy Keycloak.
-
The quickest way to get Keycloak running is by applying the official all-in-one YAML file:
kubectl create -f https://raw.githubusercontent.com/keycloak/keycloak-quickstarts/refs/heads/main/kubernetes/keycloak.yaml -
Next, create an Ingress resource to expose Keycloak at
https://auth.test. Create a file namedkeycloak-ingress.yamlwith this content:apiVersion: networking.k8s.io/v1
kind: Ingress
metadata:
name: keycloak-ingress
annotations:
nginx.ingress.kubernetes.io/ssl-redirect: "true"
spec:
tls:
- hosts:
- auth.test # Our chosen domain
secretName: auth-test-mkcert # The TLS secret we created
rules:
- host: auth.test
http:
paths:
- path: /
pathType: Prefix
backend:
service:
name: keycloak
port:
number: 8080Apply it with
kubectl apply -f keycloak-ingress.yaml.
You should now be able to access the Keycloak UI at https://auth.test.
Your browser will likely show a security warning because the certificate is self-signed. You can safely proceed.
Tired of the security warning? You can install the mkcert local CA into your system’s trust store with a simple command:
mkcert -install
Step 4: Configure Keycloak
Now it’s time to configure Keycloak for Ilum.
 Log in to the Keycloak Administration Console with the default credentials:
 admin:admin
For this guide, we’ll use the default master realm.
-
Create a Client for Ilum Navigate to Clients and click Create client. A client in Keycloak represents an application that will use it for authentication—in this case, Ilum.
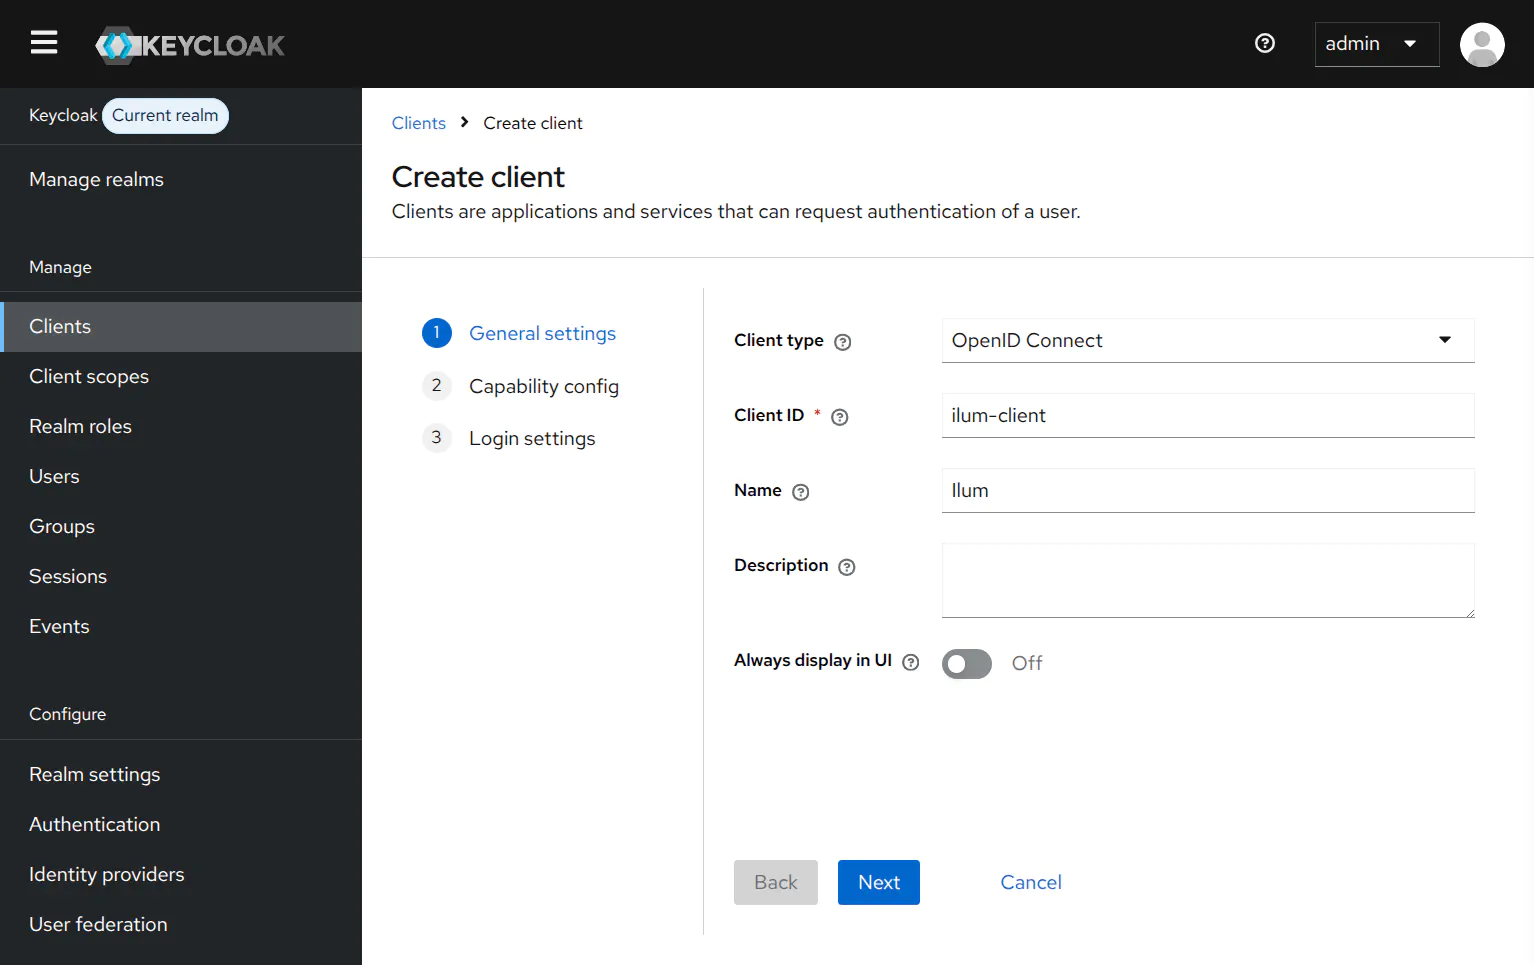 Set the Client ID to
 ilum-client. The name can be anything you like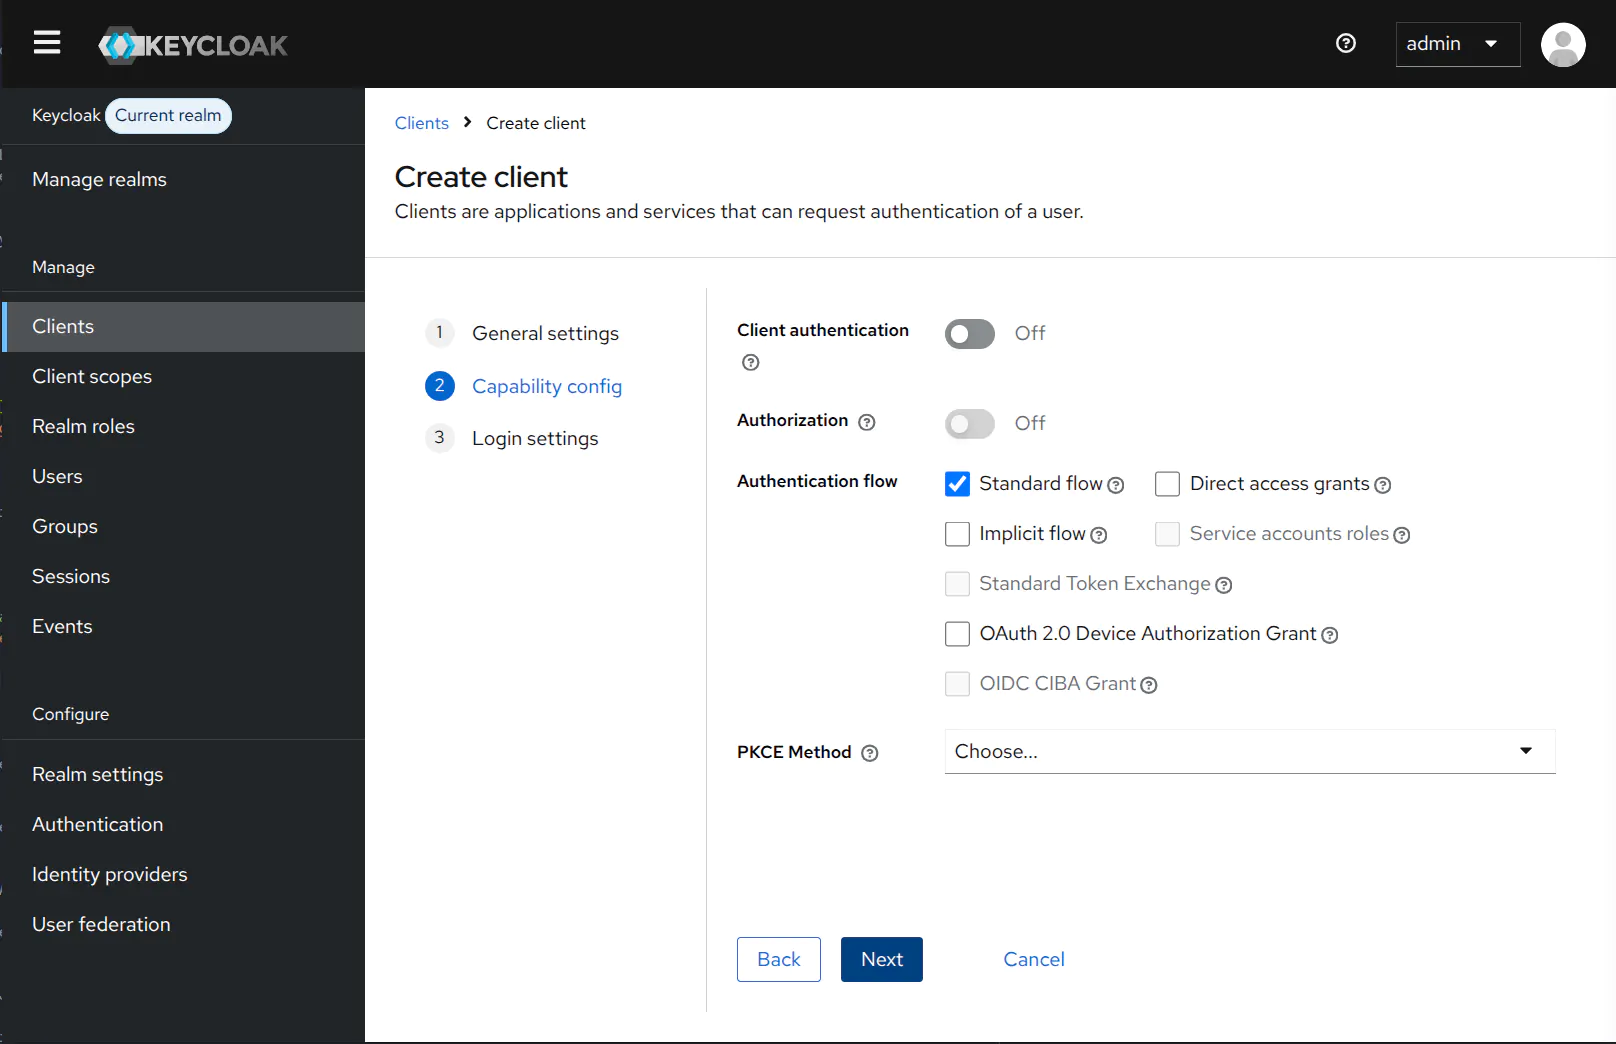 Keep the default capability settingscaution
It’s crucial to leave Client authentication switched Off. Ilum uses the OAuth2 PKCE flow, which is a more secure method for public clients (like a web UI) and doesn’t require a client secret.
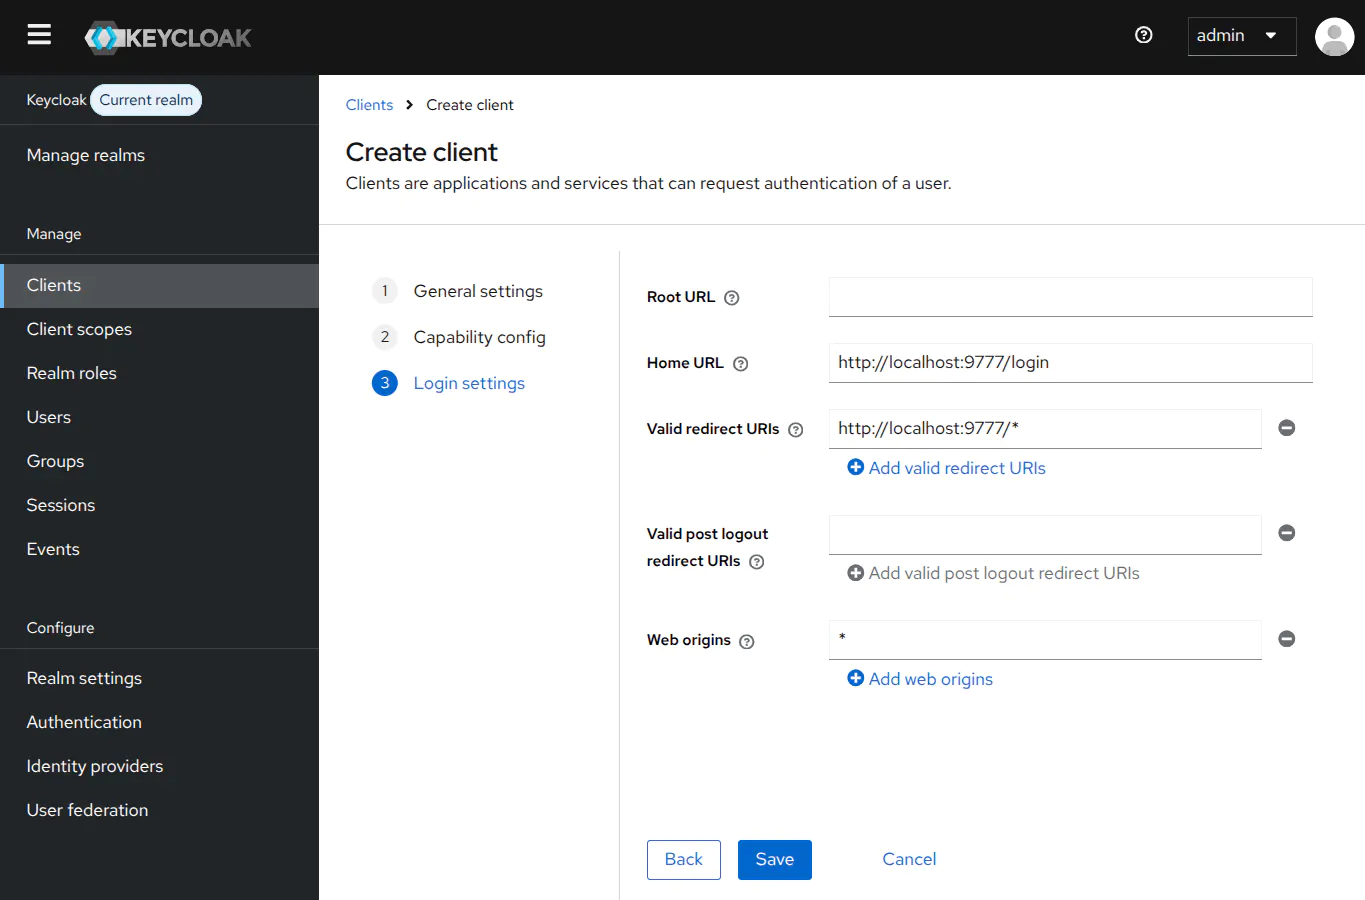 Set the home URI to the login page and the redirect URI to handle anything which comes from Ilum’s origin
Save the client.
-
Create a Sample User Go to the Users section and click Add user. Fill out the form to create your first user. After creating the user, go to their Credentials tab and set a password.
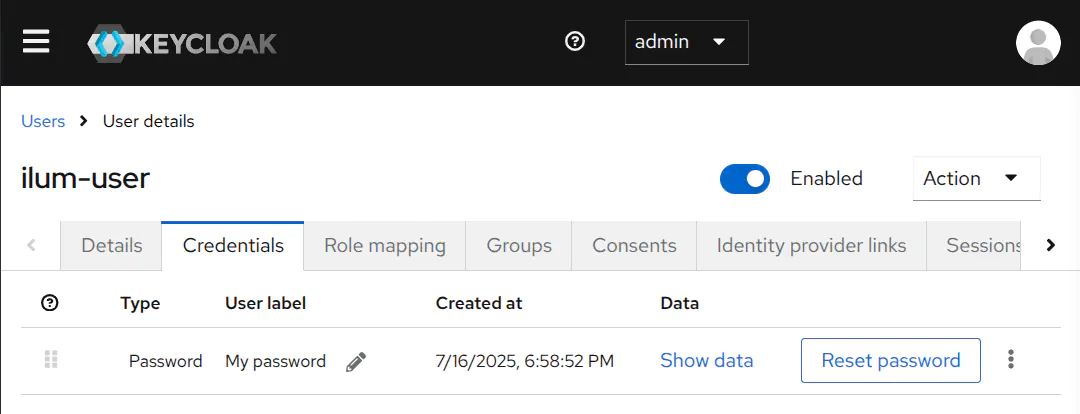 This is what the credentials tab should look like after setting a password
Step 5: Configure Ilum
The final step is to update your Ilum Helm deployment with the OAuth2 configuration. Add the following settings to your values.yaml file:
global:
  security:
    oauth2:
      clientId: ilum-client # The Client ID we set in Keycloak
      issuerUri: https://auth.test/realms/master # The issuer URI for the Keycloak realm

ilum:
  ilum-core:
    security:
      type: oauth2 # Switch the authentication type to OAuth2
      oauth2:
        adminUsers: # Grant admin privileges to these users upon first login
          - admin
          - my-user # The username you created in Keycloak
        mapping: # Map JWT claims to Ilum user fields
          id: sub
          name: preferred_username
          fullname: name
          email: email
          enabled: email_verified
          # More mapping fields are available. See the section below or the ArtifactHub page.

      trustStore: # Trust our self-signed CA so Ilum can connect to Keycloak securely
        enabled: true
        mode: single
        secretName: ca-mkcert # The secret containing our CA certificate
        single:
          caSecretFileName: ca.crt # The key in the secret that holds the CA cert
Now, apply the changes to your Ilum installation.
Step 6: Try It Out!
Everything is set up! To access the Ilum UI, forward the port from the service:
kubectl port-forward svc/ilum-ui 9777:9777
Navigate to http://localhost:9777 in your browser. You’ll be redirected to the Keycloak login page.
After you log in, you’ll be sent back to Ilum, fully authenticated!
If you were already logged into Keycloak in your browser, you might be logged into Ilum automatically. This is the magic of Single Sign-On (SSO)!
OAuth2 with External Providers
Ilum supports OAuth2 authentication with external providers like Google, Microsoft, Okta, and others. The method Ilum uses is designed to work exclusively with OpenID Connect (OIDC) providers.
To set up an external OAuth2 provider, you need to get a Client ID and the issuer URI from your provider. When using an external provider, it is also necessary for both the provider and Ilum to be exposed over HTTPS and visible to each other. Without this, the authentication flow will not work correctly.
Make sure your provider’s authentication method supports OIDC and the PKCE flow. You can usually set this by configuring Ilum as a Public Client, a Single-page application (SPA), or an OAuth 2.1 capable application in your provider’s settings.
Once you have the Client ID and issuer URI, plug them into your Ilum Helm chart:
global:
  security:
    oauth2:
      clientId: your-client-id
      issuerUri: https://your-oidc-provider.com/
      # Optional: Scopes to request from the OAuth2 provider
      # scope: "openid profile email" # <-- these are the defaults
AWS Cognito Configuration
Cognito fully supports OpenID Connect and works seamlessly with Ilum using the Authorization Code flow with PKCE. To enable it, you need to configure your Cognito User Pool App Client as a Public Client.
Setting up AWS Cognito requires pointing to the right user pool federation endpoints using your service’s REGION and USER_POOL_ID.
- Navigate to AWS Console → Cognito → User Pools
- Select your User Pool → App Integration → App Clients
- Create or edit App Client:
- Application type: Set this to Public client
- Client Secret: As we are using a Public Client, this should be "Don’t generate a client secret".
- Authentication flows: Enable "Authorization code grant"
- OAuth 2.0 grant types: Select "Authorization code"
- OpenID Connect scopes: Select
openid,profile,email - Callback URLs: Add
https://your-ilum-domain.com/workloads/list/services
Then, update your Ilum Helm chart:
global:
  security:
    oauth2:
      clientId: your-cognito-app-client-id
      issuerUri: https://cognito-idp.REGION.amazonaws.com/USER_POOL_ID

ilum-core:
  security:
    type: oauth2
Now you can deploy Ilum or customize your user claim mappings as described below.
Google Cloud Platform Configuration
To set up OAuth2 with Google Cloud Platform (GCP), you need to set Ilum up as a Single-page application (SPA) in the Google Cloud Console.
- Navigate to Google Cloud Console → APIs & Services → Credentials
- Click "Create Credentials" → OAuth 2.0 Client IDs
- Configure application:
- Application type: Single-page application (SPA)
- Name: Enter descriptive name (e.g., "Ilum")
- Authorized JavaScript origins: Add
https://your-ilum-domain.com - Authorized redirect URIs: Add
https://your-ilum-domain.com/workloads/list/services
- Note the generated Client ID
After creating the OAuth 2.0 Client ID, configure your Ilum Helm chart:
global:
  security:
    oauth2:
      clientId: your-google-client-id
      issuerUri: https://accounts.google.com
ilum-core:
  security:
    type: oauth2
Now you can deploy Ilum or customize your user claim mappings as described below.
Microsoft Azure Entra ID Configuration
To set up OAuth2 with Microsoft Azure Entra ID, you need to register Ilum as an application in the Azure portal.
For proper integration, it’s essential to specify the correct Microsoft’s JWT token version in the application manifest.
Set the requestedAccessTokenVersion parameter in the app manifest to 2. This change ensures that Azure issues tokens in the desired format.
For detailed steps on configuring this parameter in Azure Entra ID,
refer to Microsoft’s official guide.
If you miss this step, the JWT's iss claim won’t match the issuer from the OpenID discovery endpoint,
and your API calls will fail with a 401 Unauthorized error.
- Navigate to Azure Portal → App Registrations
- Click "New registration" or select an existing app
- Configure application:
- Name: Enter descriptive name (e.g., "Ilum")
- Supported account types: Choose the appropriate option for your organization
- Redirect URI: Select "Single-page application (SPA)" and add
https://your-ilum-domain.com/workloads/list/services
- After creation, go to Manifest and set
"requestedAccessTokenVersion": 2 - Go to API permissions → Add permissions → Microsoft Graph → Delegated permissions:
- Add at least
openid,profile, andemailpermissions
- Add at least
- Note the Application (client) ID from the Overview page
After registering the app, configure your Ilum Helm chart:
global:
  security:
    oauth2:
      clientId: your-azure-client-id
      issuerUri: https://login.microsoftonline.com/TENANT_ID/v2.0 # Replace TENANT_ID with your tenant ID or domain

ilum-core:
  security:
    type: oauth2
Now you can deploy Ilum or customize your user claim mappings as described below.
GitLab Configuration
GitLab OAuth2 integration provides seamless authentication using GitLab as the identity provider. This integration supports both GitLab.com and self-hosted GitLab instances, making it ideal for organizations already using GitLab for their development workflows.
- Navigate to your GitLab instance (GitLab.com or self-hosted)
- Go to User Settings → Applications (for personal apps) or Admin Area → Applications (for instance-wide apps)
- Click New Application and configure:
- Name: Enter descriptive name (e.g., "Ilum")
- Redirect URI: Add
https://your-ilum-domain.com/workloads/list/services - Confidential: Uncheck this option (configures as Public Client)
- Scopes: Select
openid,profile,email, and optionallyread_user
- Note the generated Application ID
After creating the application, configure your Ilum Helm chart:
global:
  security:
    oauth2:
      clientId: your-gitlab-client-id
      issuerUri: https://gitlab.com # Use your GitLab instance URL if self-hosted
ilum-core:
  security:
    type: oauth2
Now you can deploy Ilum or customize your user claim mappings as described below.
Because of the use of the PKCE flow, this will work with GitLab.com, GitLab CE 13.0+, or GitLab EE 13.0+
OAuth2 Configuration Options
Here are all the parameters you can customize in the OAuth2 setup:
global:
  lineage:
    enabled: false
  security:
    oauth2:
      audiences: # Optional: A list of valid audiences for the JWT token
      clientId: # The Client ID from your OAuth2 provider
      scope: # Optional: Scopes to request from the provider (e.g., "openid profile email")
      issuerUri: # The issuer URI of your OAuth2 provider

ilum-core:
  security:
    type: oauth2 # Set to "oauth2" to enable it
    oauth2:
      adminUsers: [] # List of usernames to grant admin privileges upon first login
      mapping:
        id: # The JWT claim for the user ID
        name: # The JWT claim for the username
        email: # The JWT claim for the user's email
        fullname: # The JWT claim for the user's full name
        description: # The JWT claim for the user's description
        department: # The JWT claim for the user's department
        groups: # The JWT claim for user groups (array)
        roles: # The JWT claim for user roles (array)
        singleGroup: # The JWT claim for a single user group (string)
        singleRole: # The JWT claim for a single user role (string)
        enabled: # The JWT claim that indicates if the user is enabled
        enabledTrue: # The value of the enabled claim that means the user is enabled
If you don’t set enabledTrue, Ilum assumes true or enabled mean the user is active.
If you omit both enabled and enabledTrue, all new users are ENABLED by default.